In the previous post I went into the background about diagnosing the fault on my washing machine, which has come down to some kind of motor problem. The next step then was to replace the brushes as they are highly likely to be worn out after nearly 10 years of use.
There are lots of videos out there on Youtube and other places on how to do this, but I have learned a few lessons through doing this that aren’t in the videos so I thought I’d share my experiences.
First thing to do was to get some replacement brushes. There are loads of sources of these, but I bought some pattern parts from a reputable website which were listed as being compatible and looked something like this:
I started with a guide referenced in the previous post here, although this was light on detail. It suggested lying the machine on its back to access the motor, so this is where I started:


There were a number of Torx screws on the grey plastic panel which were easy to remove, revealing the bottom of the drum and the motor itself. So far, so good…

The motor has a big multi-way connector and an earth, and one of the brushes was clearly visible in its white plastic holder. You can just see the yellow connection to the brush in this picture. There was also a load of black dust and muck everywhere, which is consistent with worn brushes.

When I removed the old brushes it was quite clear what the problem was:
No prizes for guessing which is which! The old brush was worn right down to the wire, which was no doubt what was causing the error and if I’d left it much longer it would have failed altogether.
Everything was going to plan so far… so now just a case of installing the new parts. The brushes are on the end of a spring, with a copper wire attached to the brush at one end and a metal tag at the other, which in turn connects to the rest of the motor. The brush sits in a channel within a plastic holder (in white on the picture above). The spring is compressed into the channel, and then held in place by slotting the clip into two slots in the side of the channel. This is hard to explain, and it is covered in the various videos. This picture shows what it looks like when in place:

The brushes have an angled edge, and you have to put the new ones in to match the ones you have taken out.
Althought most of the guides suggested removing the motor, I thought I’d try doing it with the motor in place as I had read that this was possible in some cases. However – it isn’t! I spent a long time wrestling with the new brushes, but compressing the spring whilst trying to fiddle the tag into place proved not only frustrating but also ultimately impossible. It was marginally easier on the one in plain view, but not so for the one on the other side. The number of times I got it almost there only for it to ping out again… and I was lucky not to fracture the brushes which are quite brittle.
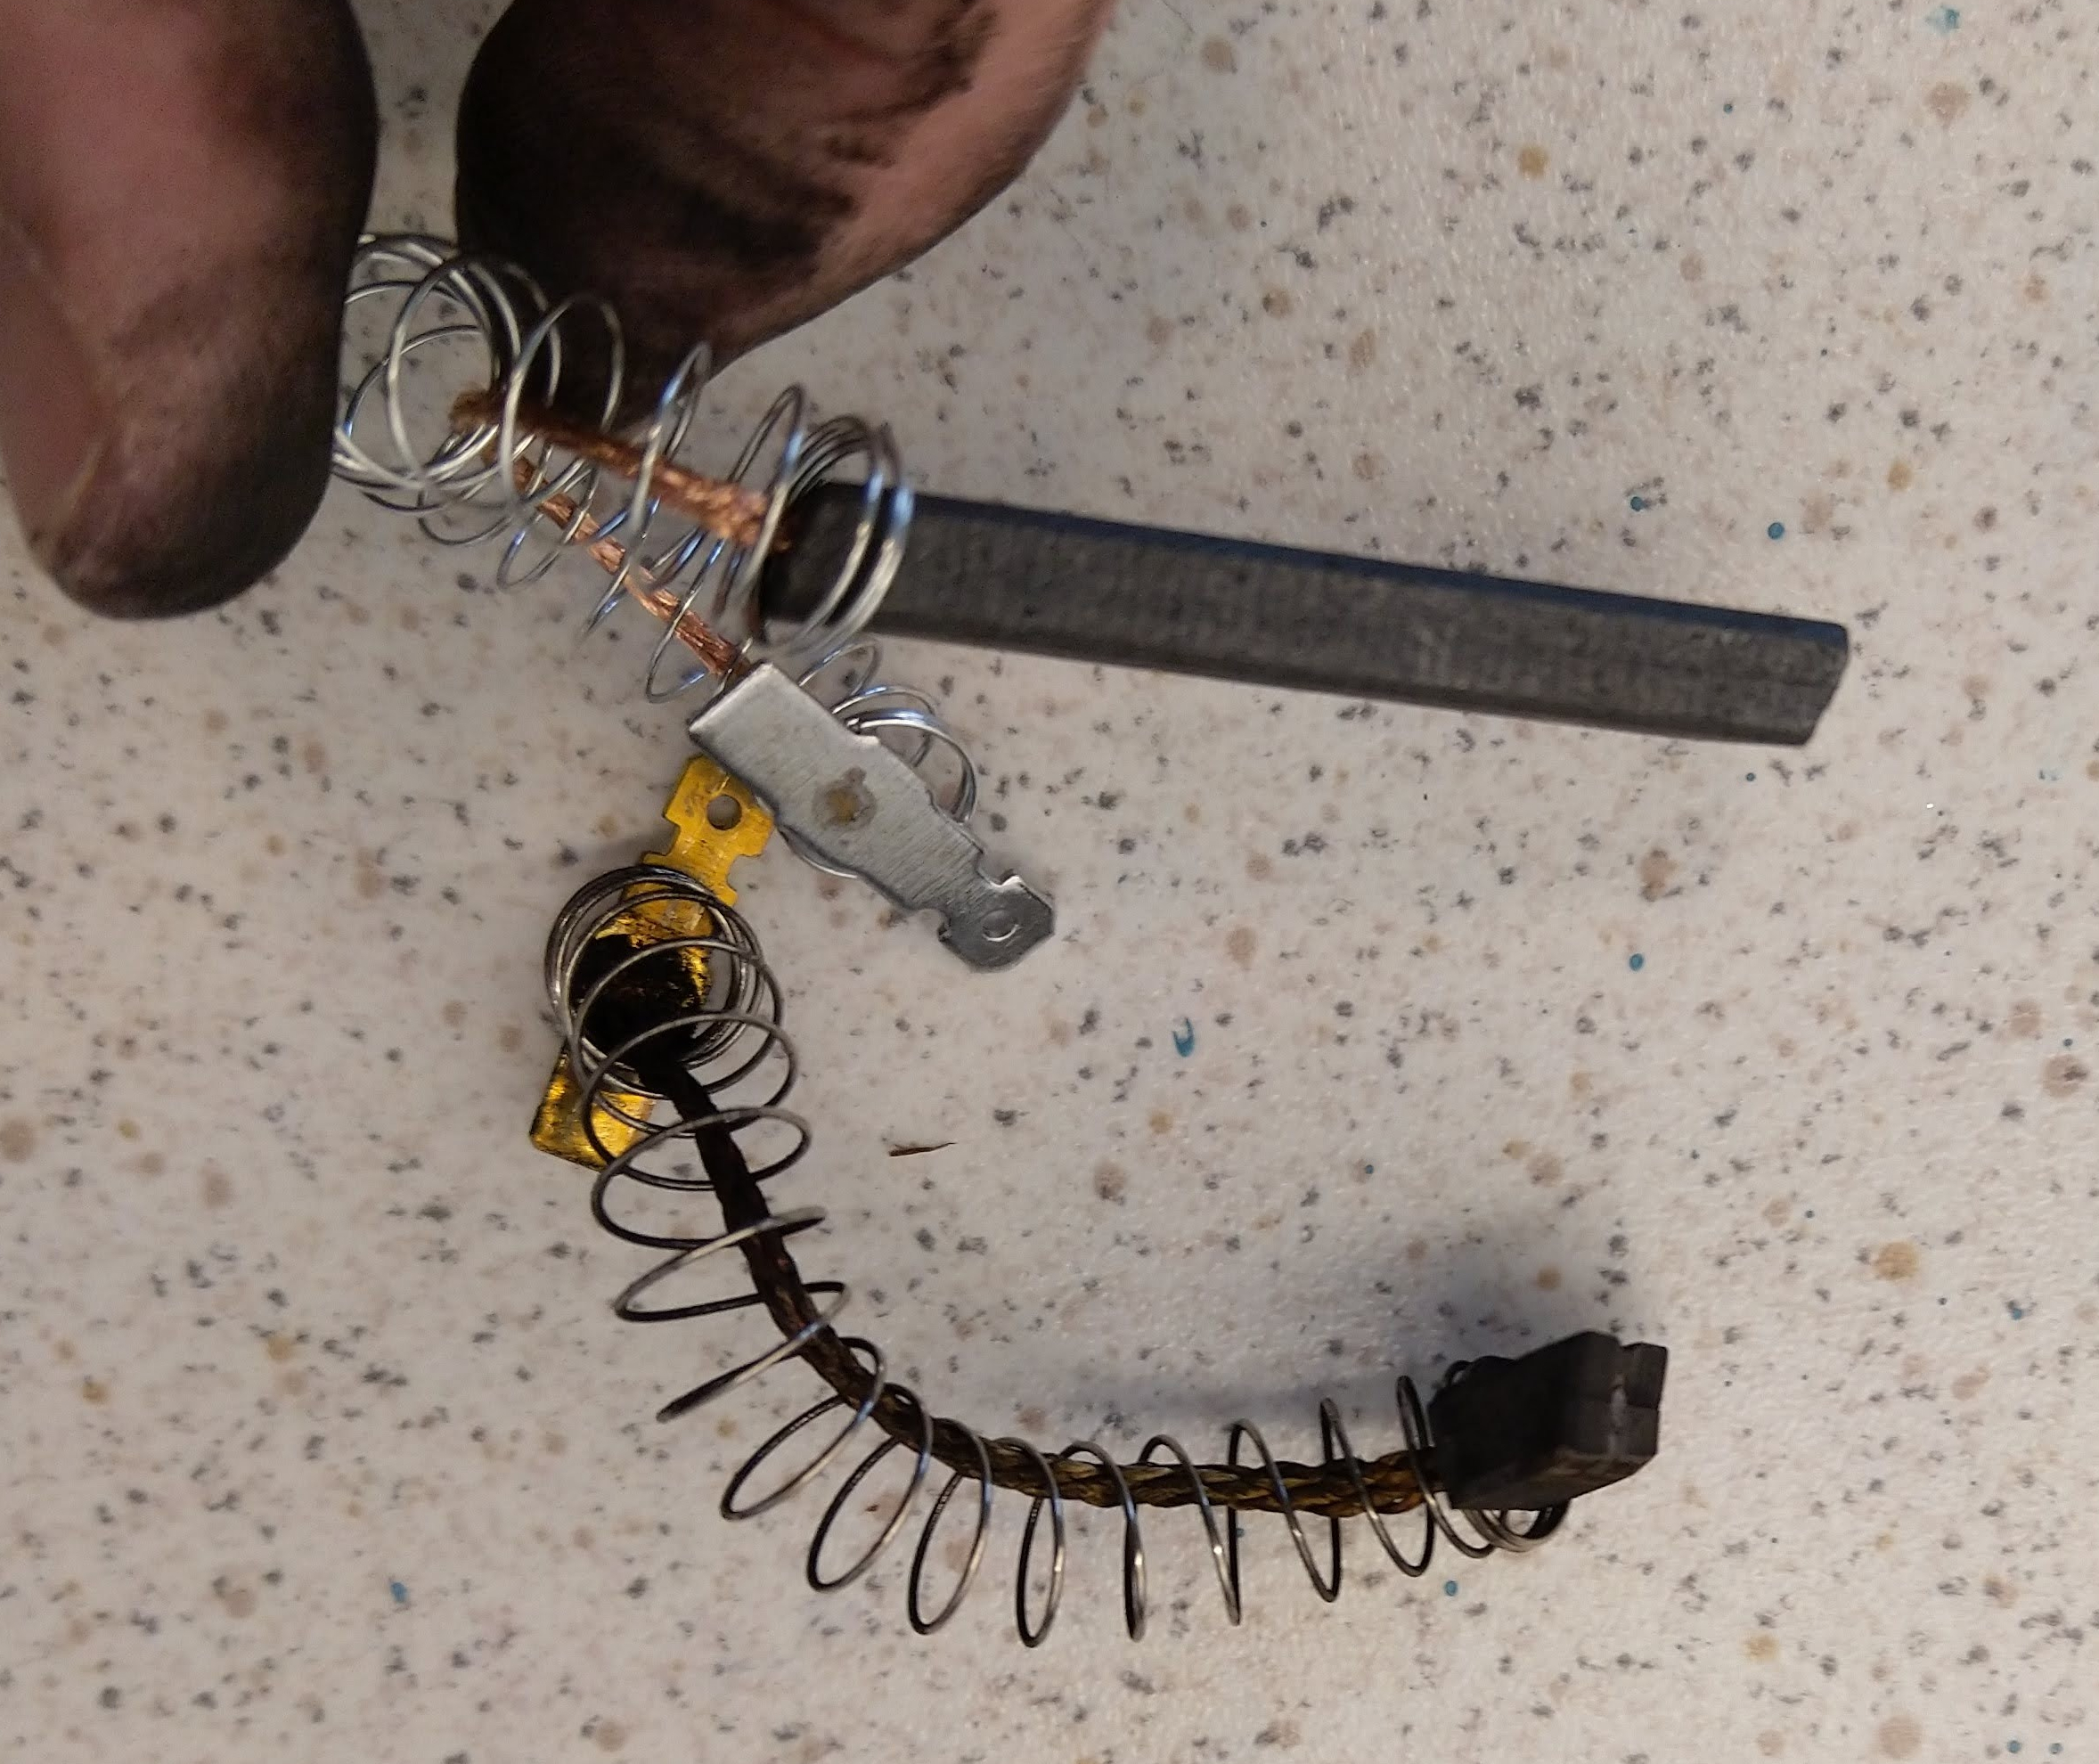
The other thing which became apparent was that although visibly identical, the pattern parts I had bought just did not fit properly. The brush, spring etc were fine, but the tag was subtly different in shape which meant that you could not press it through the slot properly to lock in place. It just wouldn’t budge and after a lot of effort I eventually resorted to trimming some bits off the new one in an attempt to make it fit. After some trial and error I did one side in, but I just couldn’t do the other one. This picture shows a close up the original tab (brass) and the new one (silver) and you can see where I have cut it down somewhat:

This is already turning into an epic post, so I will stop there and for Part 3 I’ll cover the final steps.
